Organization and Documentation
Handled w/ Notion

This workflow will guide you through the steps to create websites and web apps using Framepad for brainstorming and collaboration, Figma for wireframing and high-fidelity designs, and Framer for prototyping and animations. The process is broken down into key stages, including conceptualization, design, prototyping, and handoff.
1. Project Kickoff & Conceptualization (Framepad)
Objective: Establish the project’s vision, goals, and ideas collaboratively.
Tools: Framepad
Stakeholder Meetings: Gather all relevant stakeholders to align on project goals, target audience, features, and key pages or user flows.
Brainstorming & Idea Sharing: Use Framepad as an online whiteboard to brainstorm ideas. Sketch rough outlines of the user interface, key features, and flow.
Collaborate with team members to add sticky notes, rough wireframes, and comments in real-time.
Mind Mapping: Map out user journeys and website structure on Framepad to have a visual overview of the project’s flow. This helps identify core screens and user interactions.
Moodboards & Inspiration: Add design inspirations, color palettes, typography references, and visual moodboards directly in Framepad to keep all ideas centralized.
2. Wireframing & UI Design (Figma)
Objective: Create wireframes and transform them into high-fidelity designs.
Tools: Figma
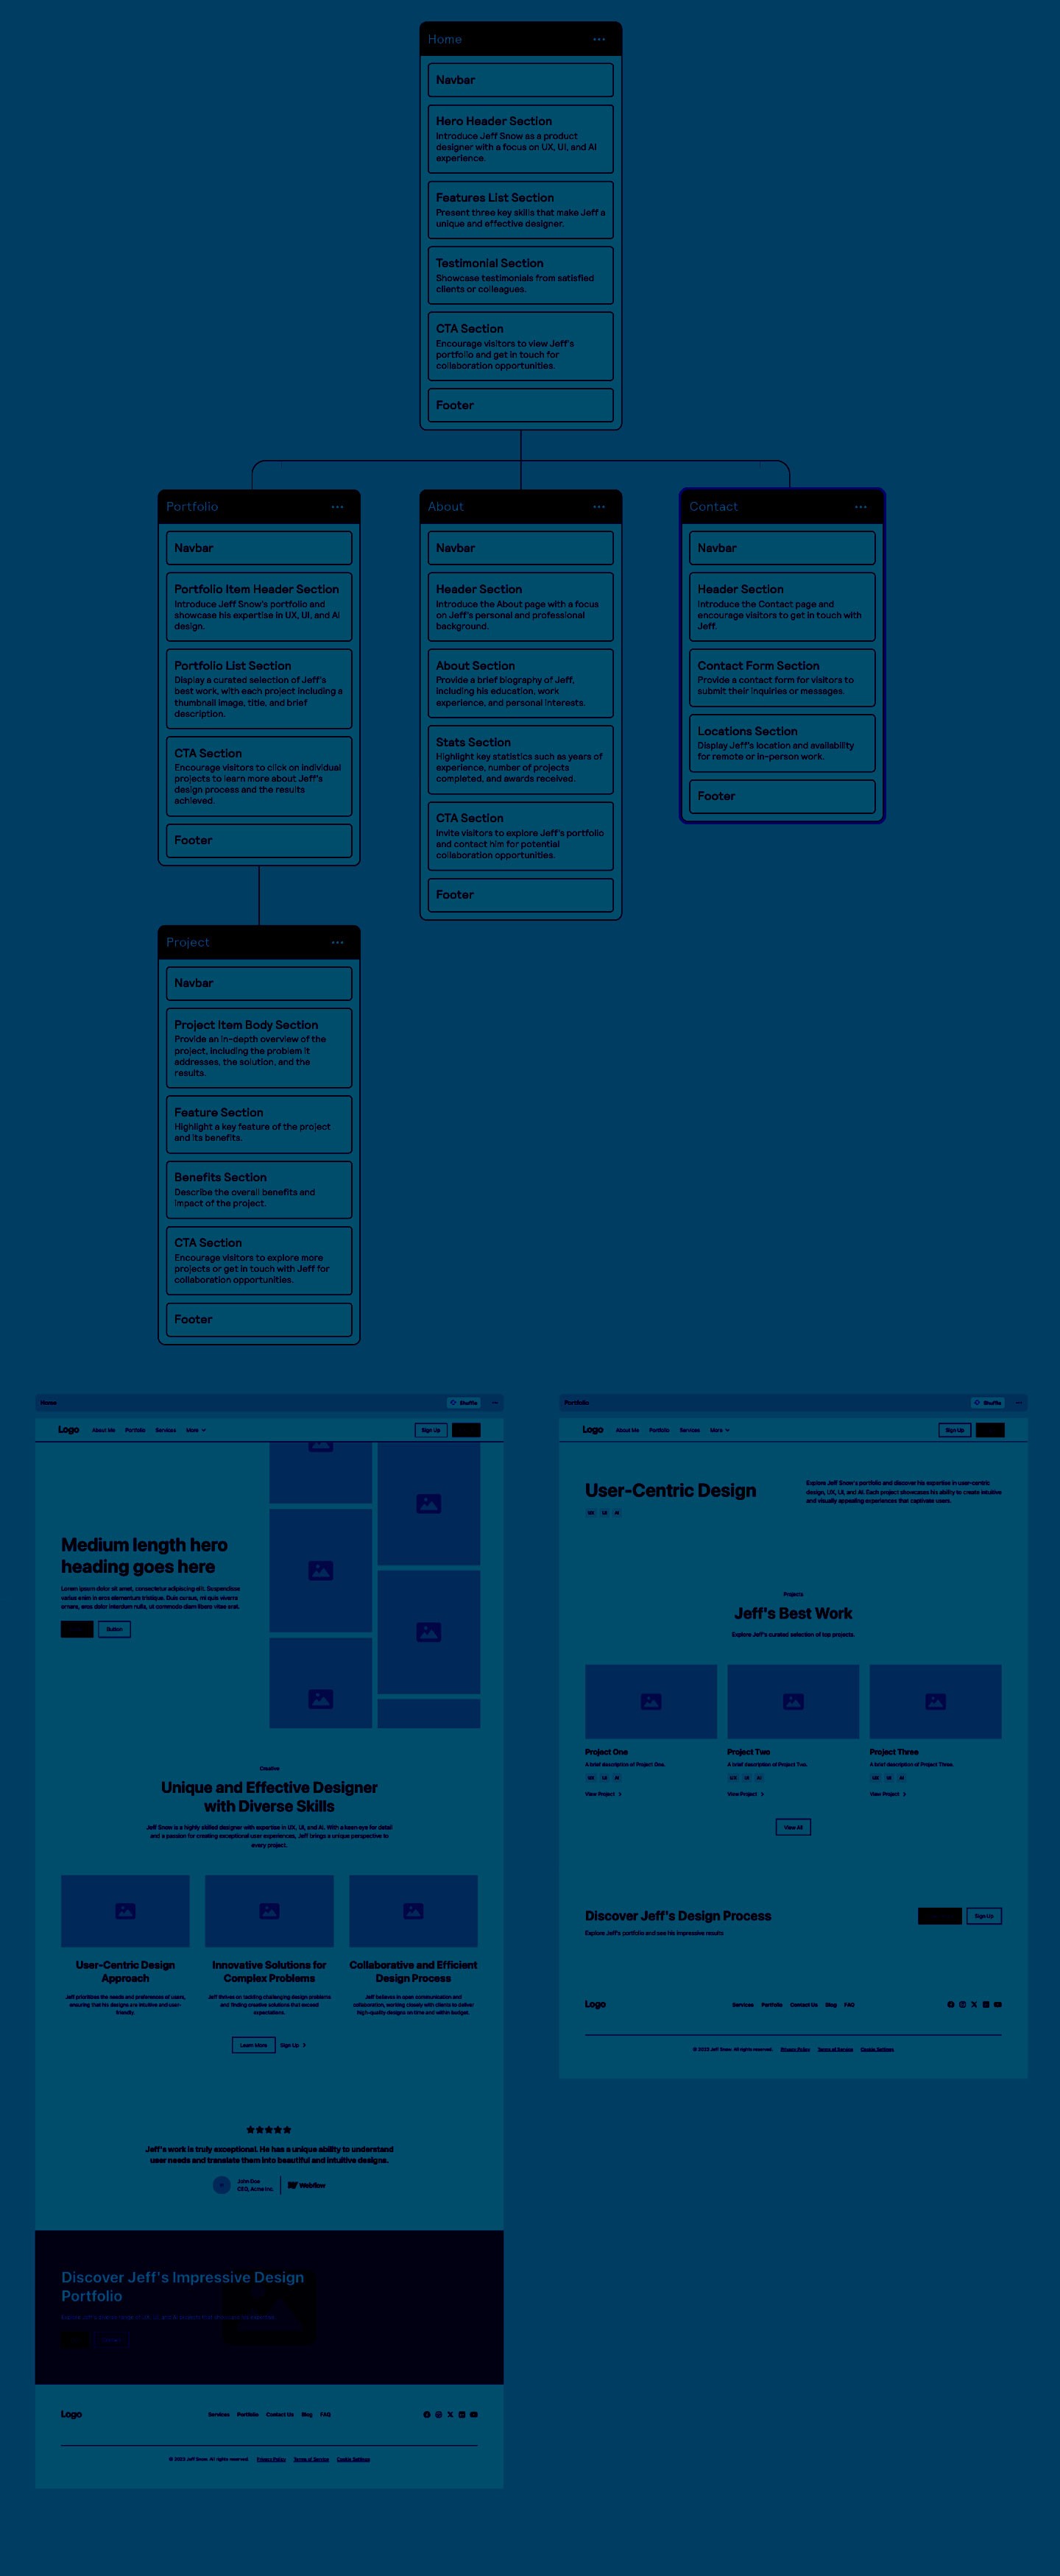
Low-Fidelity Wireframes: Based on the brainstorming session in Framepad, create low-fidelity wireframes in Figma. Start by mapping out layouts for key pages (e.g., home, product, about, etc.).
Define the information architecture, basic page layouts, and user interactions.
User Flow Design: Design the user flow with Figma’s prototyping features to link wireframes together for simple navigation.
UI Design & Visual Styles: Once wireframes are approved, move into high-fidelity UI design in Figma. Apply the brand’s visual style, including:
Typography
Color schemes
Iconography
Spacing and alignment guidelines
Design System Creation: If the project is complex, create a design system in Figma to standardize components (buttons, forms, navigation, etc.) across the project.
3. Interactive Prototyping (Framer)
Objective: Create interactive prototypes with animations and transitions.
Tools: Framer
Import Designs from Figma to Framer: Export your design components from Figma and import them into Framer to maintain consistency across platforms.
Interactive Prototyping: Use Framer to add interactive elements such as hover effects, clicks, and page transitions to your static Figma designs.
Define custom interactions, such as form submission animations or sliding navigation menus, to make the prototype feel more like the final product.
Micro-interactions & Animations: Add micro-interactions for elements like buttons, toggles, and scroll-based animations to improve the user experience. Use Framer’s animation tools to create smooth transitions between pages and components.
Responsive Design Testing: Use Framer’s responsive design features to ensure that the design works well on different screen sizes (e.g., mobile, tablet, desktop).
4. Collaboration, and Refinement (Figma & Framepad)
Objective: Collaborate with stakeholders to iterate and refine the design.
Tools: Figma, Framepad
Share Prototypes for Feedback: Share the Framer prototype with stakeholders for review. This provides a clickable, interactive version that stakeholders can test on different devices.
Collect Feedback: Use Framepad to host another collaborative session to gather feedback on the prototype. Document key points for refinement.
Iterate on Designs: Return to Figma to apply necessary design changes. Sync these updates to Framer for a revised interactive prototype.
5. Handoff to Development (Figma)
Objective: Prepare the design for handoff to developers.
Tools: Figma
Developer Handoff: Use Figma’s developer handoff features to share design specifications, including:
CSS values
Spacing, padding, and margins
Fonts and colors
Design assets and exportable components
Framer Handoff: If using Framer for animations, share the interaction logic and animation details with the development team.
Documentation: Ensure all user flows, interactions, and visual styles are properly documented in Figma for easy reference.
6. Final Testing & Deployment
Objective: Ensure the website/web app meets design standards and functions well before launch.
Tools: Framer (for final testing)
Prototype Testing: Use Framer to test the final prototype across multiple devices and browsers. Ensure that animations, transitions, and interactions match the original design intent.
QA and Design Consistency Checks: Work closely with the development team to perform QA testing. Check for consistency between the coded website/web app and the design.
7. Post-Launch Iteration
Gather User Feedback: After launch, collect user feedback to identify any pain points or areas for improvement.
Iterate & Update: Based on the feedback, make iterative design changes in Figma and Framer for future updates.
Conclusion:
Using Framepad for ideation, Figma for UI design, and Framer for interactive prototyping provides a comprehensive workflow to streamline website and web app design. This approach enhances collaboration, creativity, and execution, ensuring a polished final product.